
In this lesson, you will learn how to further customize your course and add payment options.
If you navigate to the Settings tab of the LMS LearnDash dropdown on the left-hand side, you will see this screen;
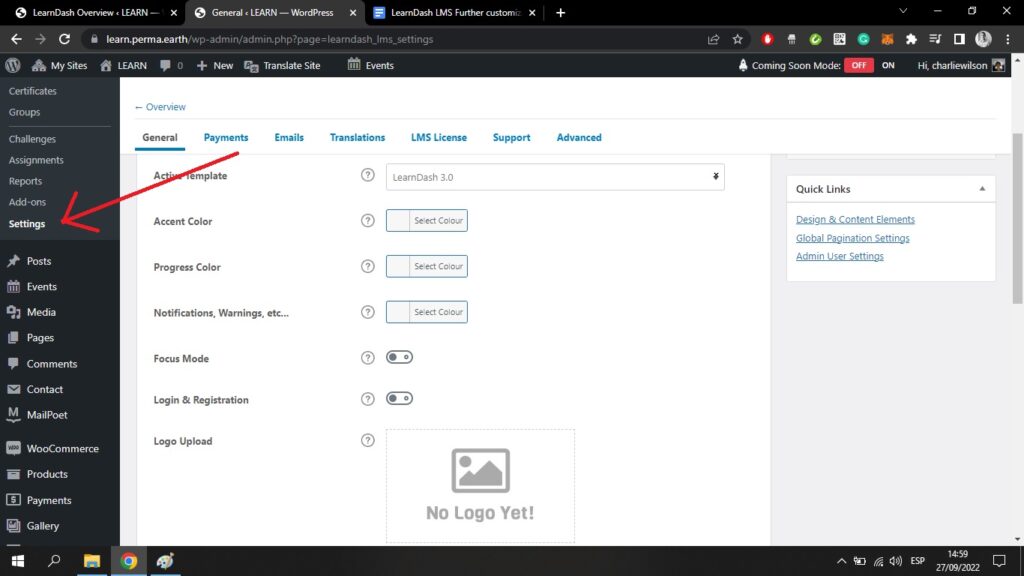
Make sure that the Active Template is set as LearnDash 3.0. You will then be able to set the Accent Color, Progress Color, and Notifications Color that will appear throughout your course.
You can also choose to upload your own logo. If you toggle on the Login & Registration tab, these settings will also apply to the login and registration screen for users.
Accepting Payments
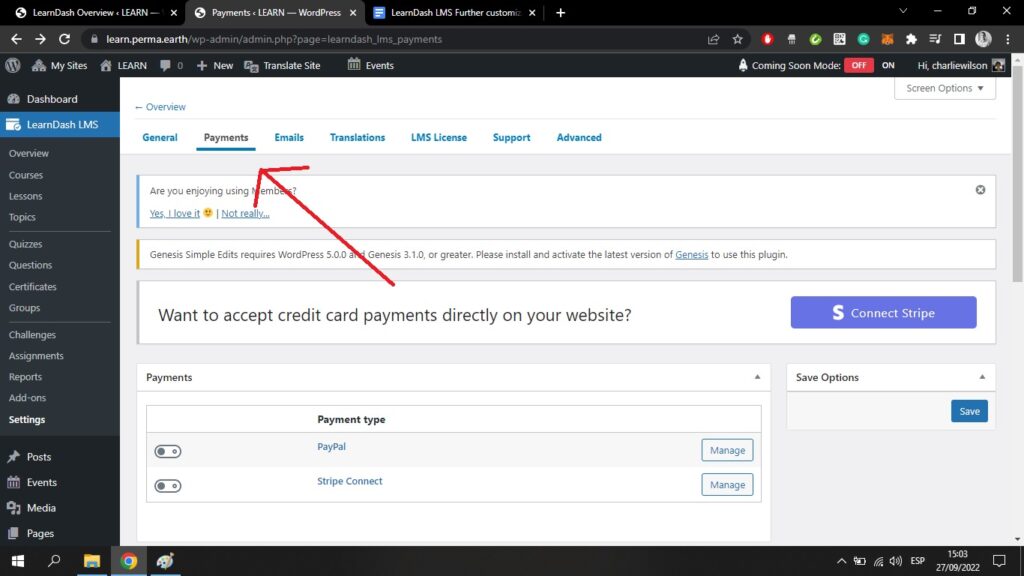
If you intend to create a paid course, you can navigate from here to the Payments tab at the top of your screen. Here, there are options for entering your PayPal or Stripe details.
By clicking on PayPal you come to this screen;
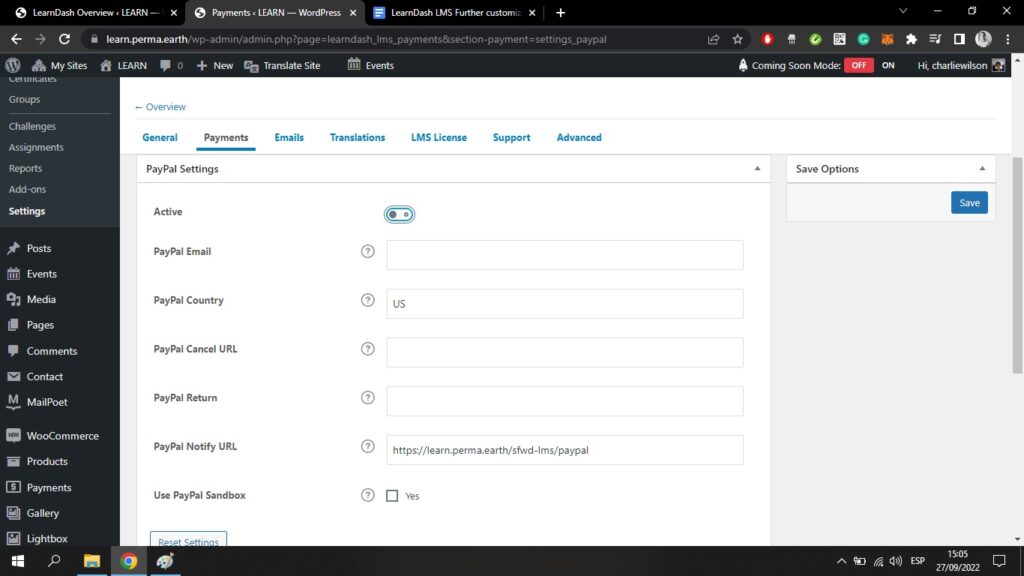
To accept payments you will have to toggle on the Active tab. You can then enter all the details of the PayPal account where you want to receive payments. Remember to click the blue Save button when you are done.
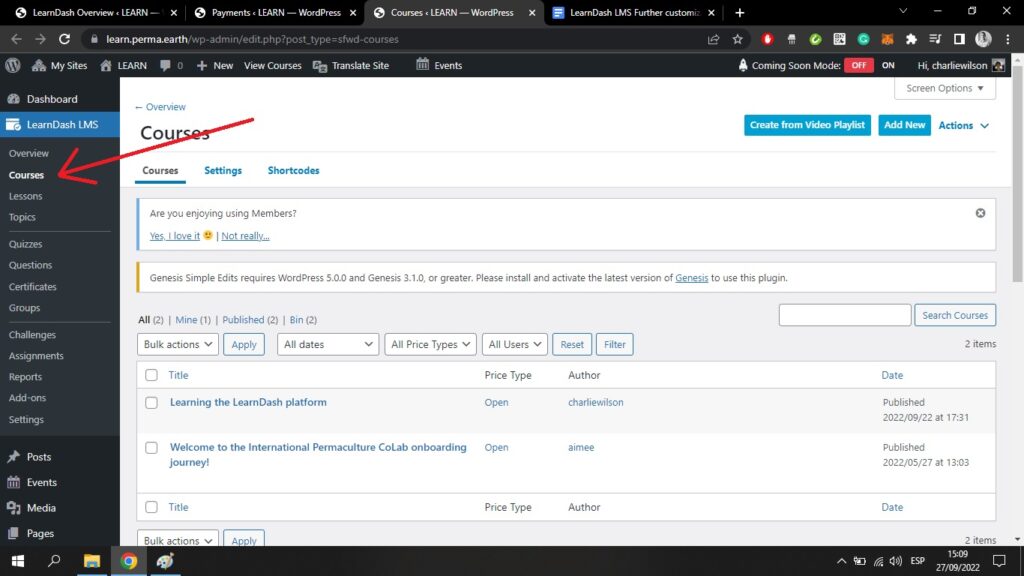
Remember that there are only two course access modes that accept payment. To change this setting, navigate to the Courses tab on the LMS LearnDash dropdown;
If I click on my course and then navigate to the Settings tab, I will find these Access Mode settings;
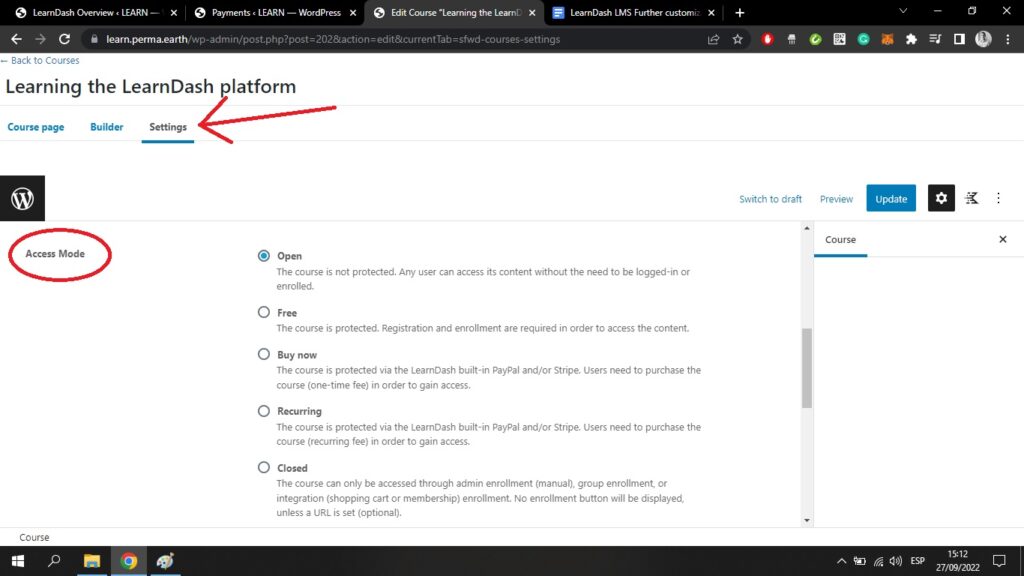
Buy Now and Recurring are the two course types that require payment. You would need to toggle one of these on, and set pricing points, if you want to make your course a paid course.
If you want to make your course free, simply choose the Free setting.