Hey there, let’s continue on from the last lesson.
Again, we will look at the WordPress block editor. On your Lesson page (or any other page that uses the WordPress block editor), you can see these tabs on the right-hand side, under the heading Lesson;
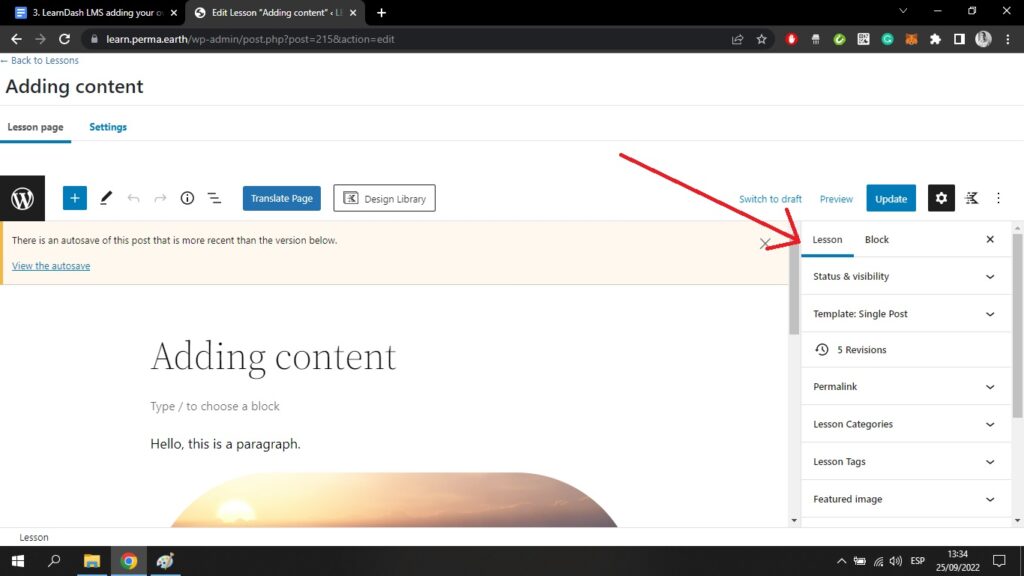
By clicking on Status and visibility you will see when your lesson was published, whether it is publicly visible, and who authored the lesson. Here you can also delete this lesson and send it to the trash.
By clicking the Template tab, you will see that you are using the default template.
Underneath this tab, you will see how many revisions you have made to the lesson; ie. how many times you have made changes and saved them.
By clicking the Permalink tab, you can change the URL of this lesson. By default, the URL will end with the lesson title you have created. It is probably best to keep it this way.
By clicking Lesson categories you can group this lesson into a specific category. This can be helpful with organization of your course but is not totally necessary.
By clicking Lesson tags you can tag the lesson with specific words. This will group the lesson with other lessons that are tagged with the same word. Again, this can help with organization, but is not totally necessary.
By clicking Featured image you can add the main image for this lesson. This image will appear on the front end, at the very top of your lesson, directly underneath the lesson title.
By clicking Post attributes you will be able to change the order your lesson page will appear on your course. It is best to change this in the course Builder, which we navigated through in our first lesson together.
By clicking Associated content you will be able to navigate to the homepage of your course or other lessons within the course.
And finally, the Overview tab at the bottom is irrelevant for your course creation and beyond your permissions.
If you now leave the WordPress block editor and come to the Settings tab at the top left of your screen, you will come to a page that looks like this;
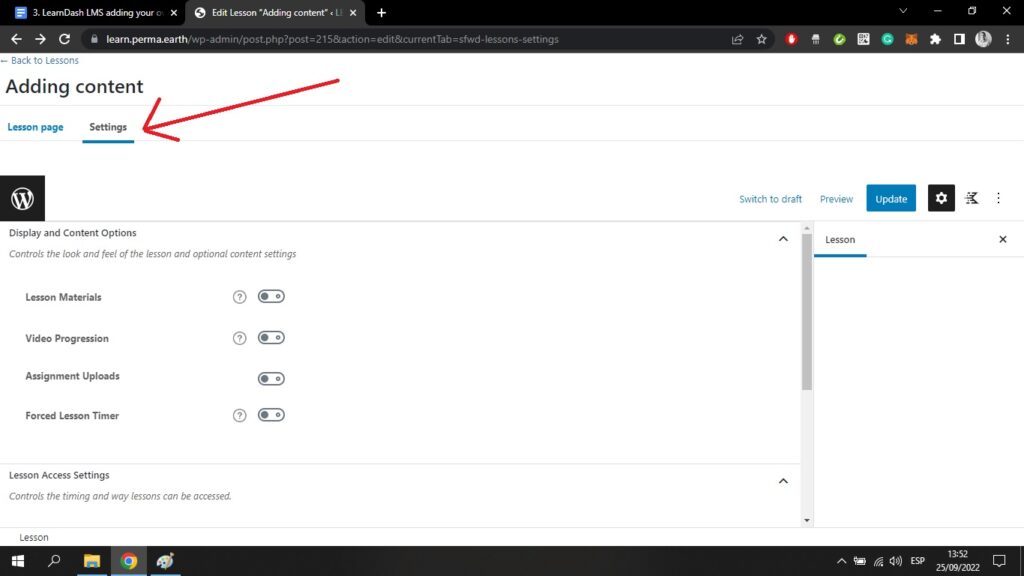
By toggling on the Lesson Materials setting, you can either add uploads from your PC or URL links to other web pages to your lesson page. This can include pictures, audio, or video files. These are intended as extra resources to help users going through your course.
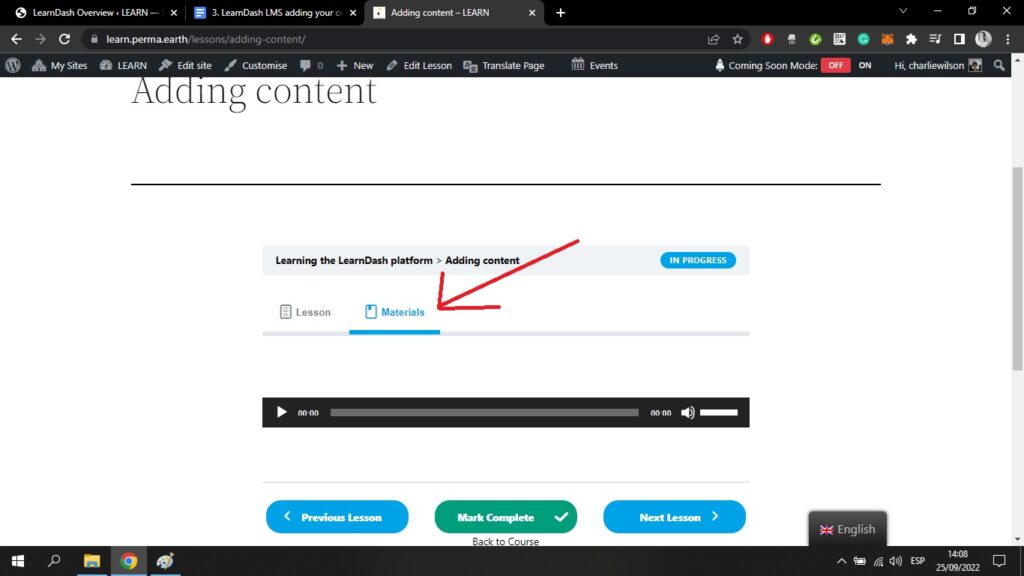
On the front end, an extra Materials page will be added to your lesson with these resources. It looks like this. (Note that I have added an audio file here);
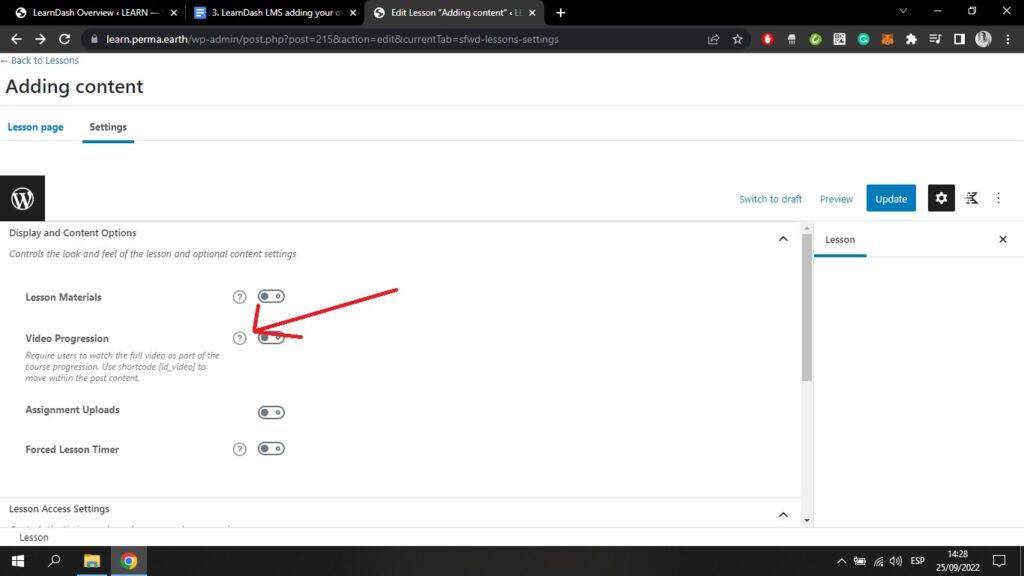
By toggling on the Video Progression setting, you can add a video to your lesson, using either a URL, an iFrame, or a shortcode. This means that you can upload videos from elsewhere (on YouTube, for example), and then embed them within your course.
You can select that the video is watched at the beginning of the lesson, before completing other steps, or that the video is watched at the end of the lesson.
Here, you can see on the front end that I have added a Shiva mantra video from YouTube to the beginning of my lesson;

Let’s take a look at some more settings on the Settings page;
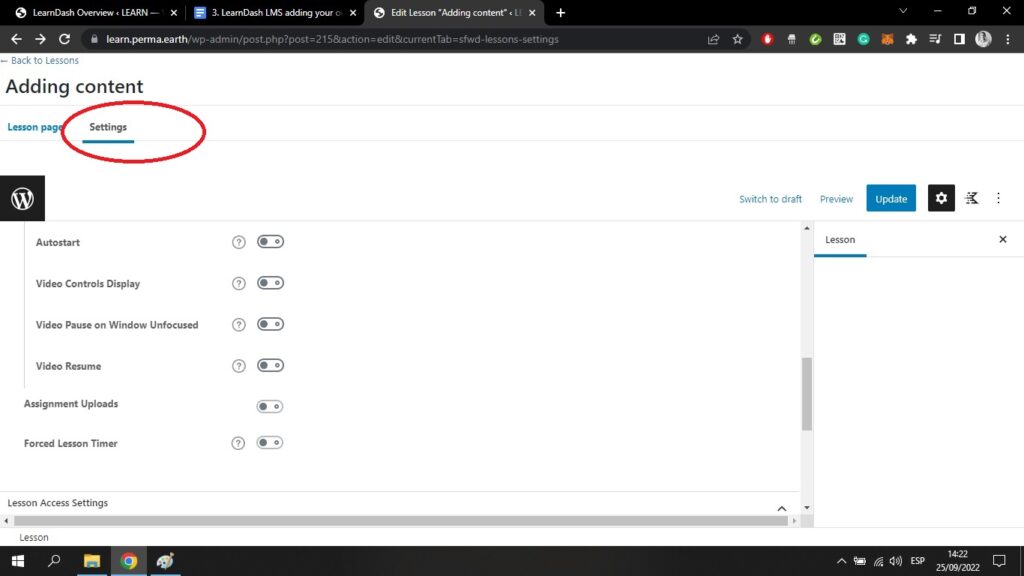
If you select the Autostart option, the video will start automatically when somebody opens your lesson.
If you select the Video Controls Display option, the video will allow users to stop, pause and play the video.
If you toggle on Assignment Uploads you can upload your own exam to the lessons page. This can be in PDF, XLS, or ZIP format. You can choose whether the assignment will be automatically approved, or whether the admin will have to go in and look at the answers and manually approve it.
Finally, if you toggle on Forced Lesson Timer, you can add a timer to the lesson, limiting how much time users have to navigate the lesson.
If you want more information about any of these settings, you either click on the question mark next to the setting or hover over the toggle button;
The last few settings on this page, if you scroll to the bottom, are access settings;
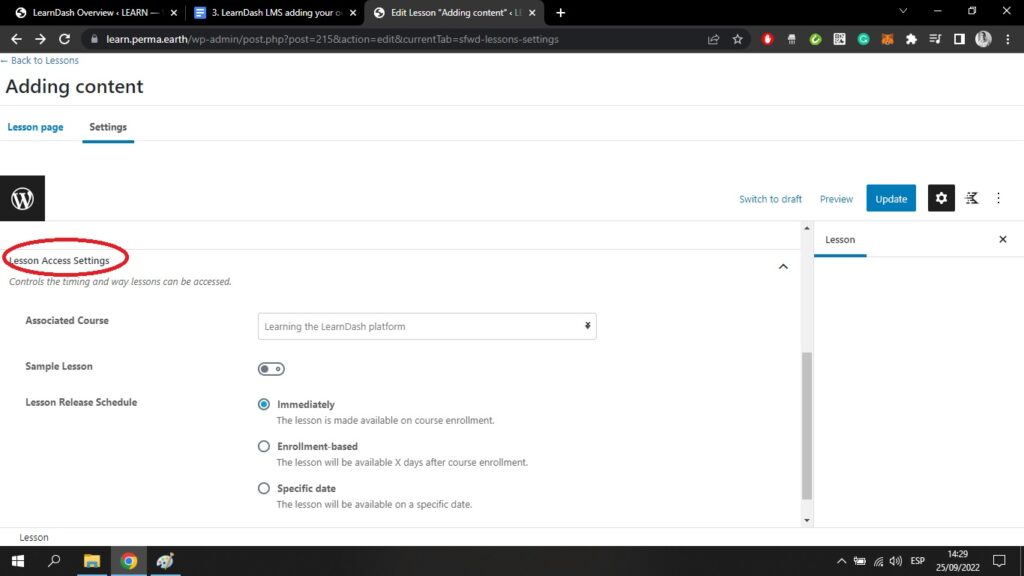
Here, by clicking on Associated Course, you can state which course the lesson is assigned to.
You can make the lesson a Sample Lesson, which means it can be accessed by anybody, whether or not they are enrolled in your course.
You can also choose your Lesson Release Schedule. The lesson can be made available immediately, a certain number of days after user enrollment, or on a specific date.